A bill is a document sent to a company by a vendor, listing goods purchased or services received, as well as the amount due for payment.
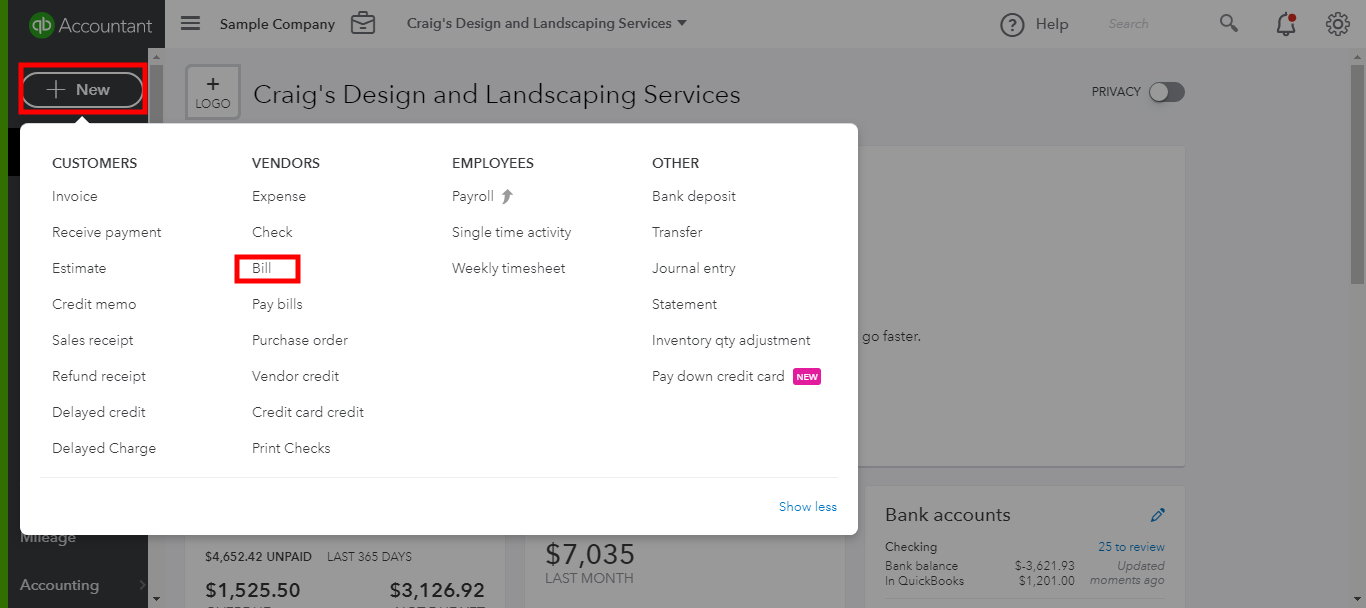
There are several ways to create a bill in QuickBooks Online. The easiest one is from the Quick Create menu (“+ New” button). You can also create a bill by clicking “Create Bill” next to the Vendor name while in the Vendor Center or from an existing Purchase Order.
Let’s look at the process of creating a bill from the Quick Create menu:
1. Click “+ New” button on the left, then under Vendors, click “Bill”.
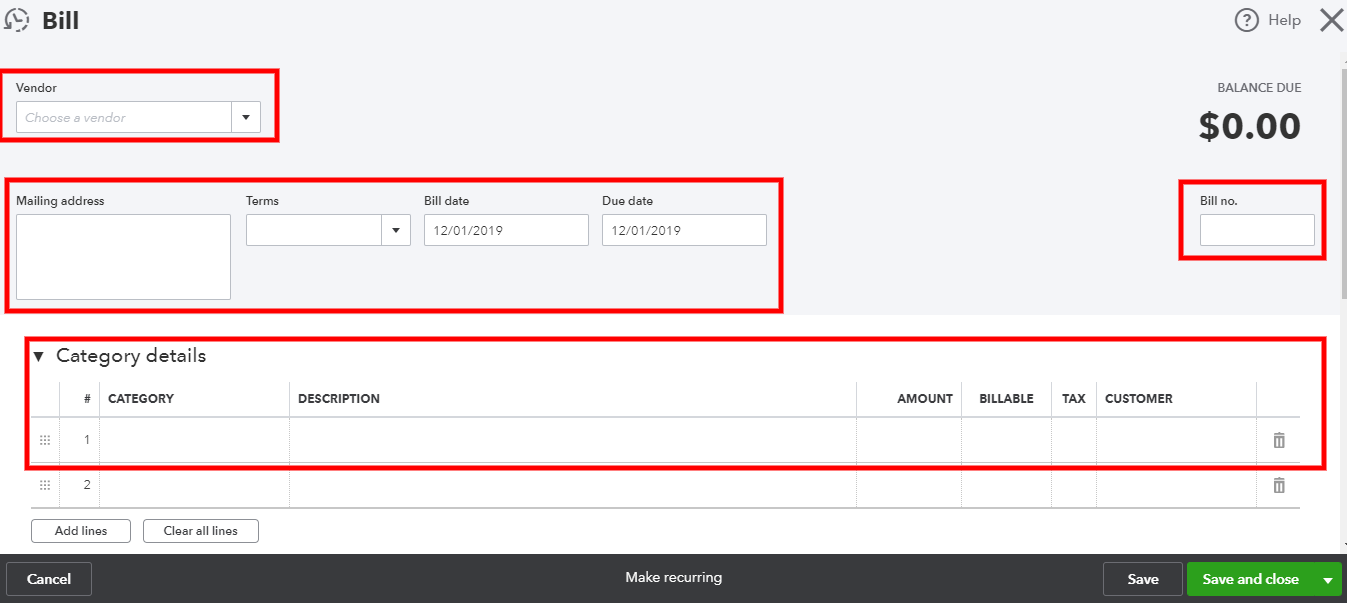
2. Fill out the necessary fields. You may use either the Category Details field to choose the type of expense category or the Item Details if you have previously set up Products and Services.
If you are using the Category Details, select the appropriate expense category, such as Legal & Professional Services, for example.
If you are using Products and Services, select the appropriate item from your list. If you purchase or sell certain items (products or services) on a regular basis, it is a good practice to set up your Products and Services items list and use them on Sales and Purchase Forms (Estimate, Sales Receipt, Invoice, Purchase Order, Bill).
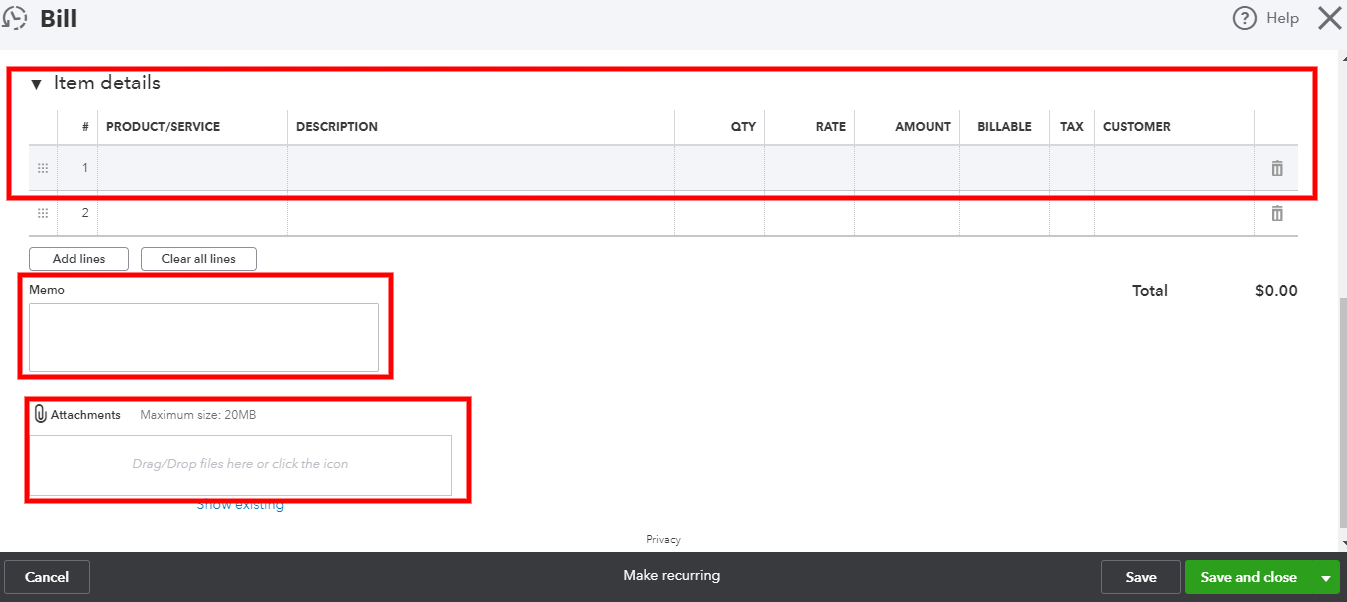
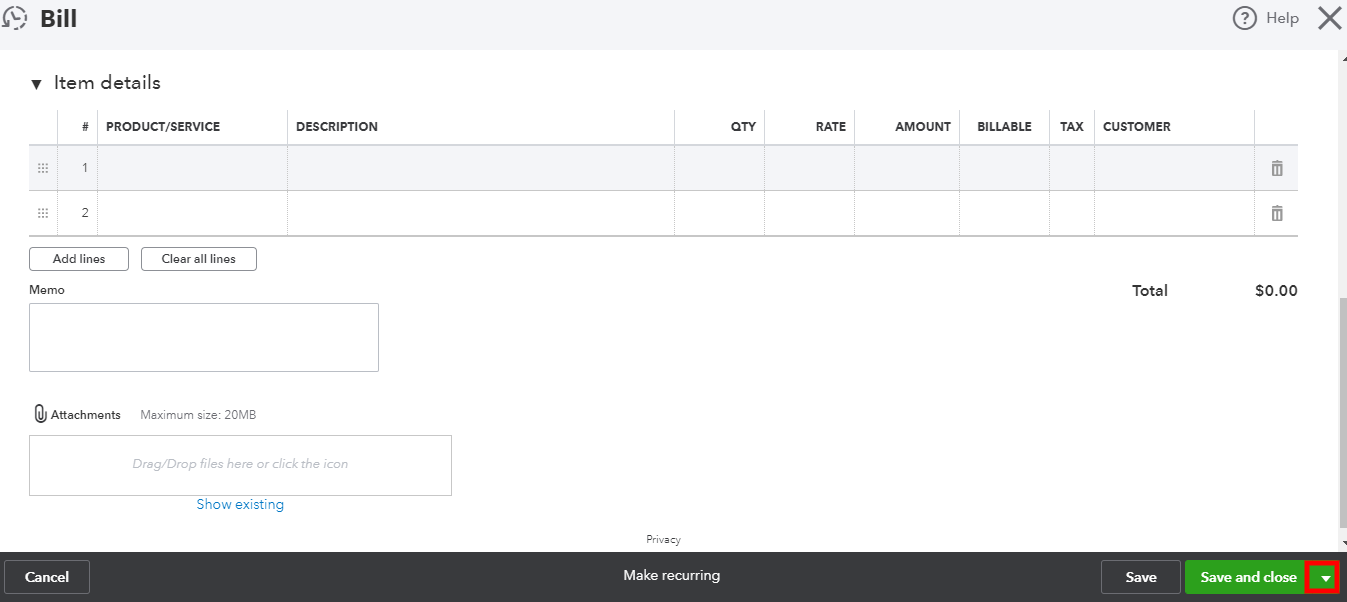
Use the Memo field to make additional notes on a bill. Use the Attachment field to attach a PDF source document. Attaching source documents to transactions in QuickBooks Online allows for a good audit trail and serves as your document storage tool.
3. At the bottom of the bill, there are additional tools: you can cancel the bill or make it recurring.
4. At the bottom right corner, you will find several options to save a bill. Before making any additional changes, I recommend saving your work. Click “Save” and continue editing. When finished, use either “Save and New” or ‘Save and Close” option under the drop down next to the green button. QuickBooks Online will remember your preference, and next time you create a bill, the green button will display your latest choice.