
You can add a new account, edit an existing one, or make an account inactive from the Chart of Accounts in QuickBooks Online.
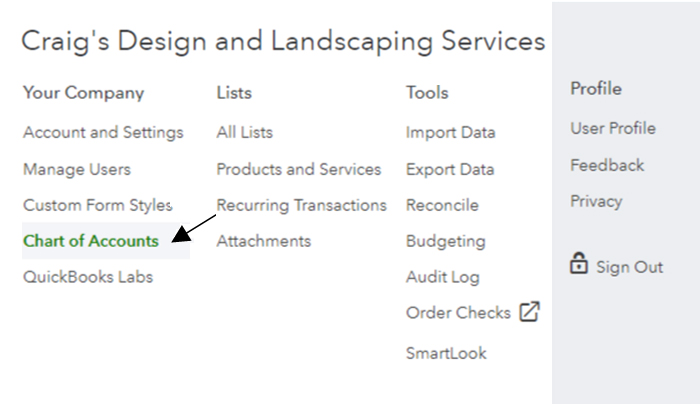
1) Click on the “Gear” icon>Chart of Accounts:
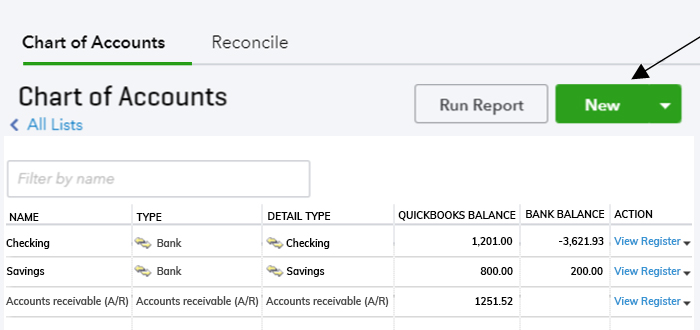
2) Click the “New” button at the top right:
3) Fill in the new account information (explained below) and click “Save and Close”.
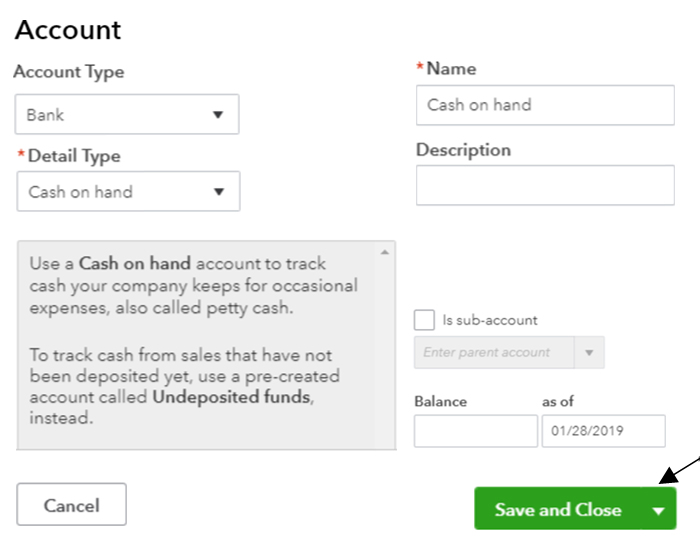
Account Type: Choose a proper account type, such as Expense, Income, Fixed Assets, Bank, Credit Card, etc.
Detail Type: Depending on which account type you selected in account type field, QuickBooks will suggest a Detail Type. Detail types can not be edited, so if you can’t find the exact match, select the closest match.
Name: This is the name of the account that will appear on your Chart of Accounts list.
Description: You can add any additional description about this account.
If the account you are creating has a parent account, then check-mark “Is a sub-account” box and select a parent account from the drop-down list.
4) Once you have successfully added a new account, you should see a message similar to the one below.
