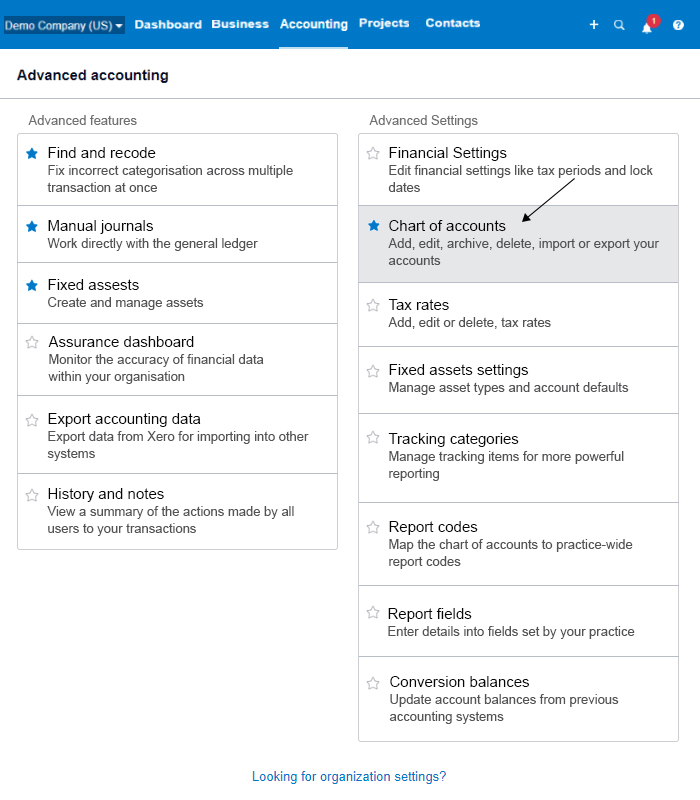
1) Go to Accounting >Advanced> Chart of accounts:
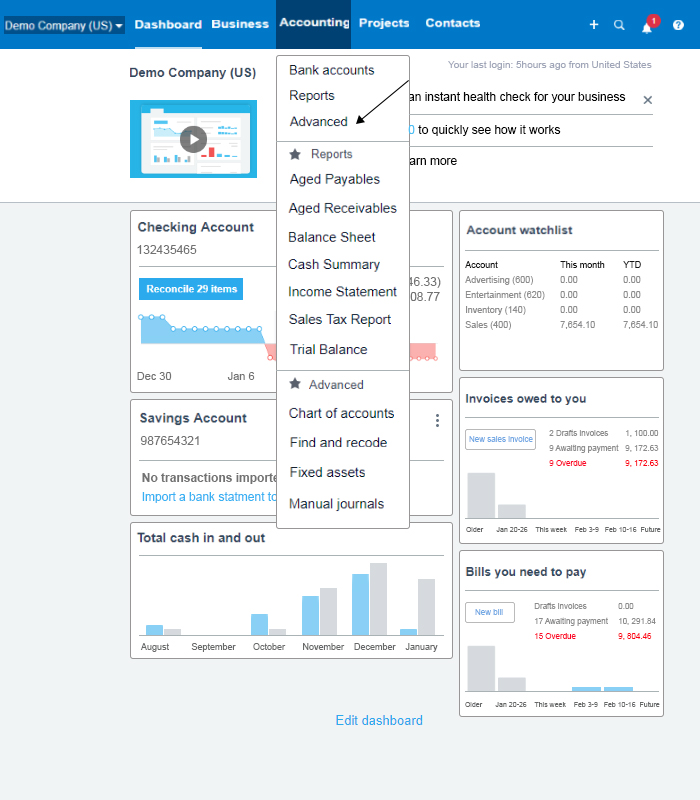
The chart of accounts in Xero is conveniently broken down into seven tabs: one tab for All Accounts, five tabs for each account type (Assets, Liabilities, Equity, Expenses, and Revenue), and the last tab for Archive.
2) To create a new account, click the Add Account button as indicated in the screenshot below.
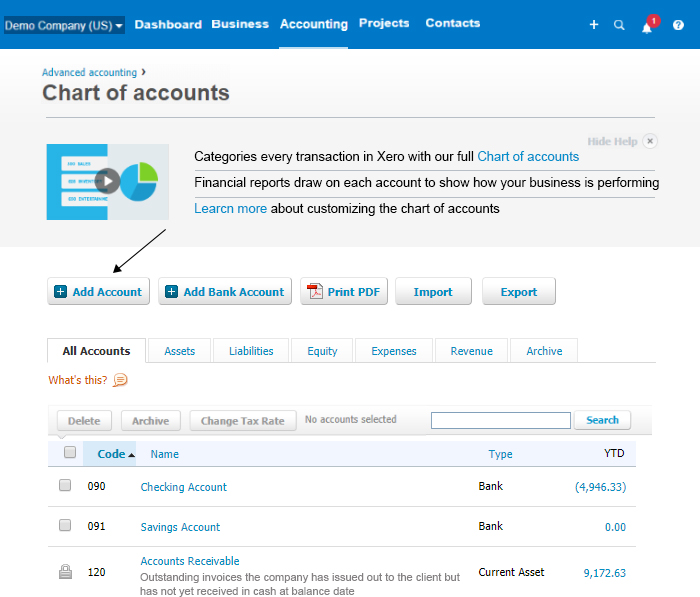
Below, you will find a screenshot and a brief description of each field. The required fields are indicated with an asterisk (*) below.

1. *Account Type – In this field, you will select the type of account you are setting up, Such as Revenue, Expense, Asset, Liability or Equity. In the screenshot above, the section entitled “how account types affect your reports” shows you what financial report each account type will appear on.
2. *Code – Each account must be assigned a unique number (up to 10 characters). Simply put, this is just an account number. Ideally, you want to group similar accounts together. For example, use a range of numbers from 4000 through 4999 for Revenue accounts, 6000 through 6999 for Expenses.
3. *Name – Each account must have a name. This will help you to easily identify what type of transactions it should be used for.
4. Description – Adding a description is optional. This will make it much easier for you or a bookkeeper to know what the account should be used for.
5. *Tax – Each account must have a name. This will help you to easily identify what type of transactions it should be used for.
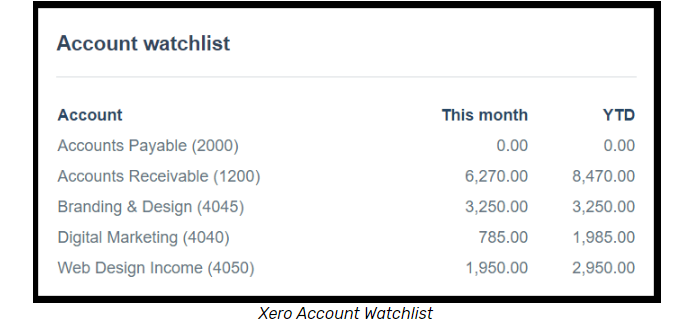
6. Show on Dashboard Watchlist – When you select this option, the account will appear on your Xero dashboard which displays immediately after you log into your Xero account. You should mark this box for any account that you want to keep an eye on. Below is a snapshot of the Account Watchlist:
7. Show in Expense Claims – By selecting this option, you will make this account available for use when adding an expense claim. An expense claim is used when you need to be reimbursed for expenses that were paid with personal funds.
8. Enable payments to this account – By selecting this option on an account, you will be able to record payments using accounts other than a bank account. For example, apply payments to invoices from a liability account, such as Customer Deposits.
9. Save – Be sure to save all of your changes.
3) Once you have successfully added a new account, you should see a message similar to the one below.
